Running the first code on Arduino: LED Blinking
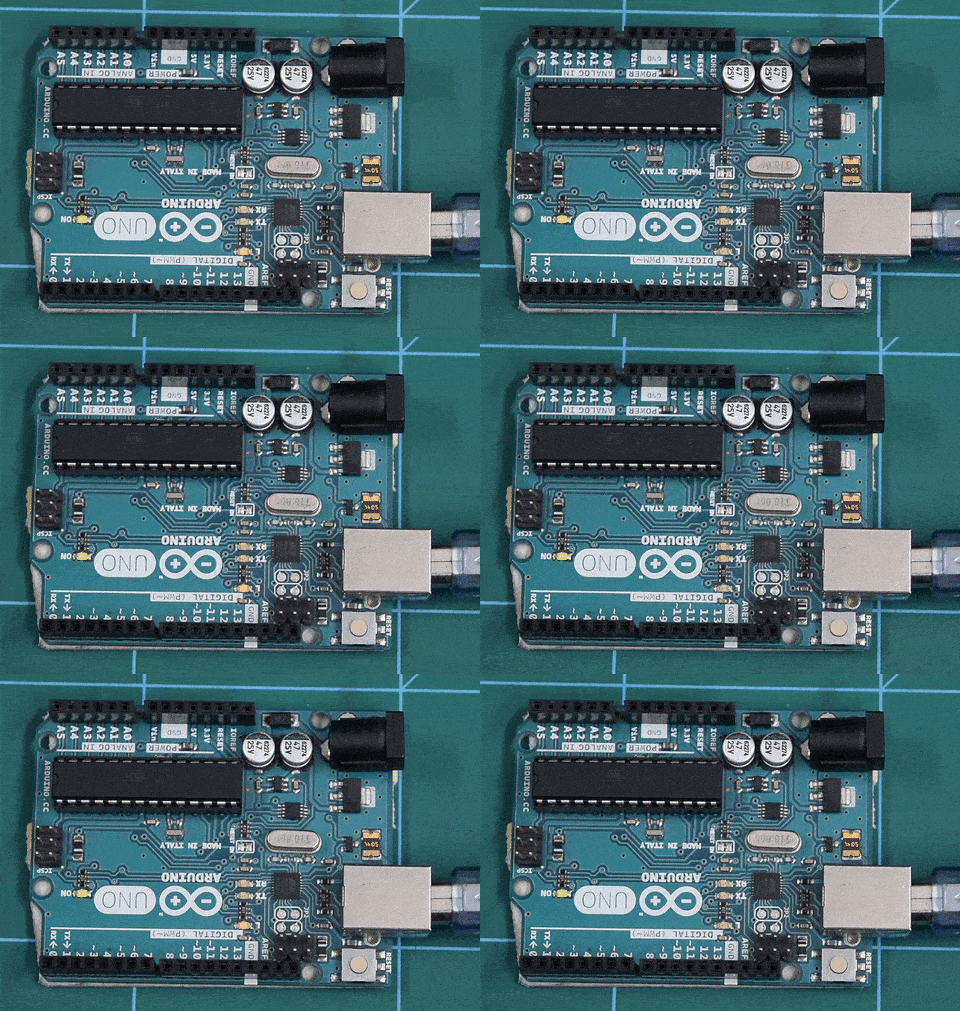
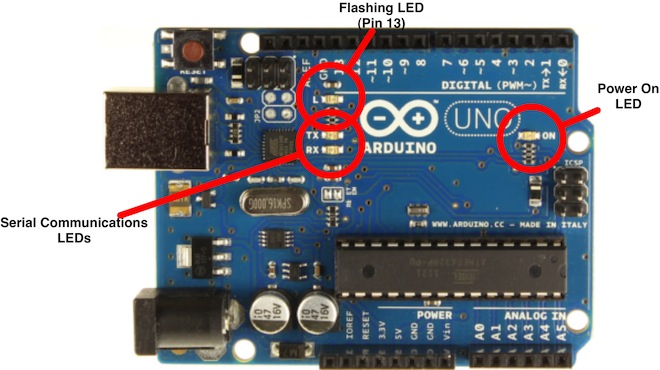
In the previous topic, you have installed the Arduino IDE software. In this topic, you will upload the first code onto the Arduino Board of LED Blinking. Remember the inbuilt Pin 13 LED? We will turn it ON for 1 second and then turn it OFF for 1 second repeatedly in this example. You will also learn how to configure the software according to the Arduino Board. Let us start! Follow the steps:
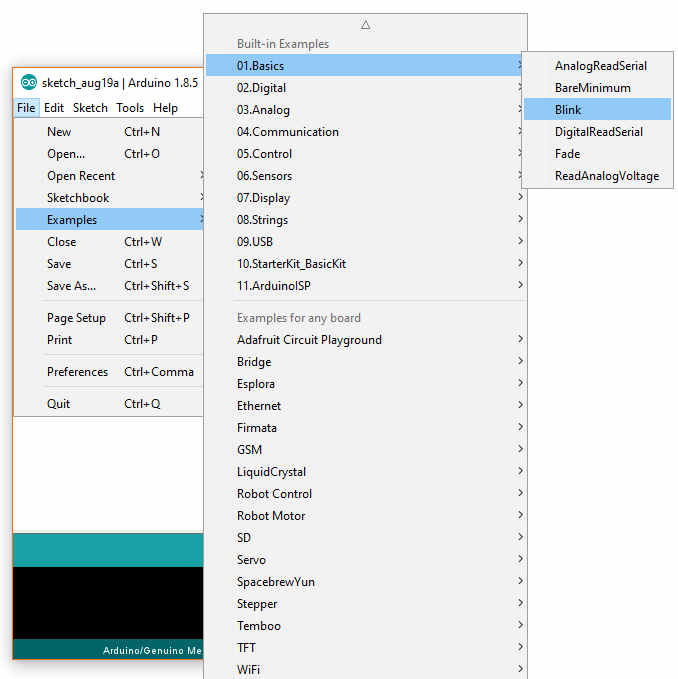
- Open Arduino IDE software. Go to File > Examples > 01 Basics and select Blink.
The code will look like this. You do not need to worry about the code now. We will go over it in the next lesson.
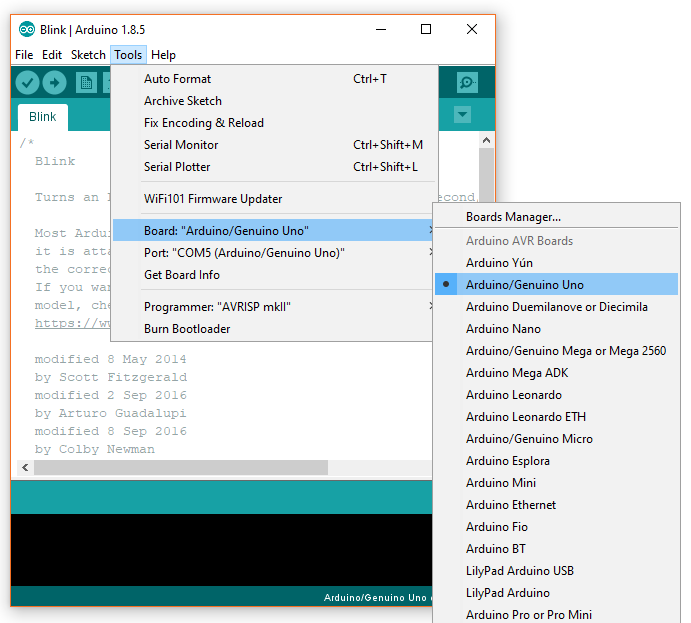
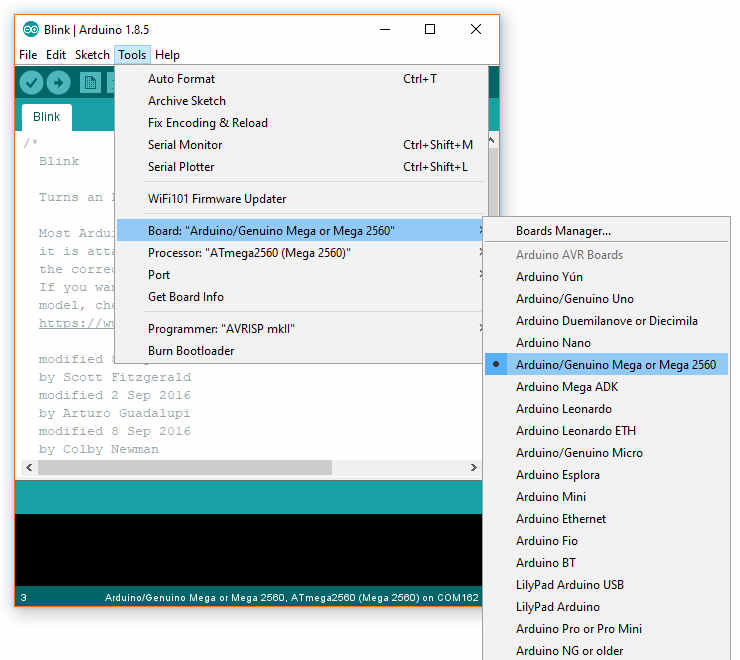
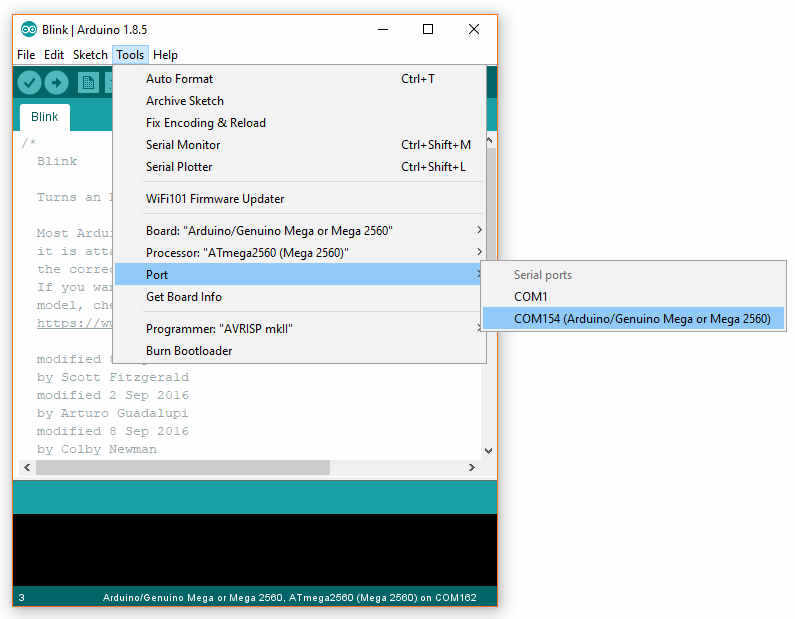
- Goto “Tools>>Board” and select “Arduino/Genuino Mega or Mega2560” if you are using evive and “Arduino/Genuino Uno”, if you are using Arduino Uno. If you are using other boards, you can find it
This also sets Processor to Processor: “ATmega2560 (Mega 2560)” for evive (Not required for Arduino Uno).
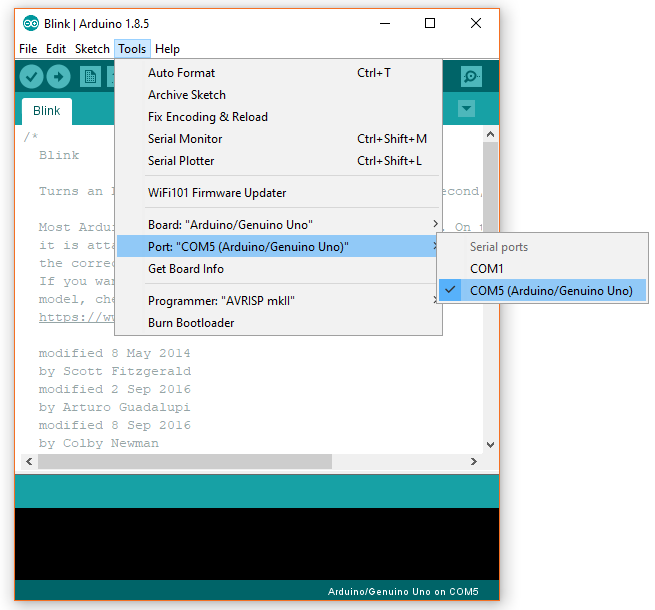
For Arduino Uno Board For evive Board Alert: While using Arduino Uno select the Arduino/Genuino Uno. - Again navigate to Tools>>Port and select the serial port from the list of serial ports available.
For Arduino Uno Board For evive Board
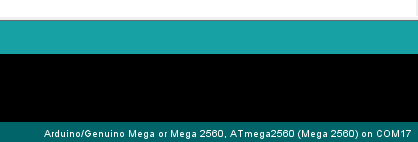
Note: The port submenu will be active only if evive is plugged in and the driver was successfully installed by your operating system. Please see the Troubleshooting Guide for more information. - Once the right Port is selected, the “Board” and “Port” name appears on the right hand lower corner of the Arduino IDE screen.
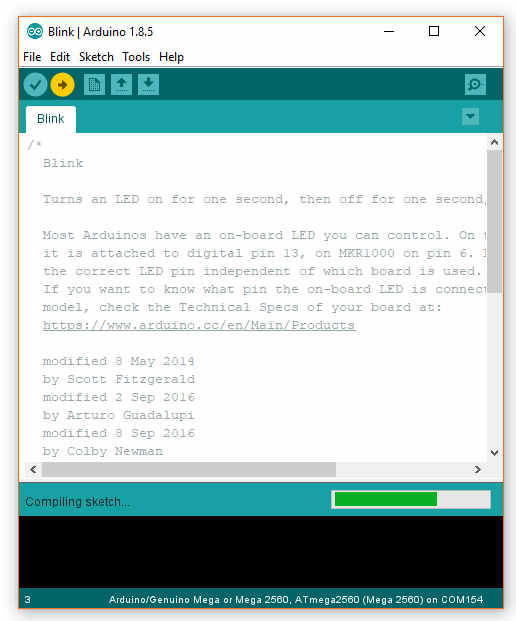
For Arduino Uno Board For evive - Now click on “Upload” Button to upload code to evive.
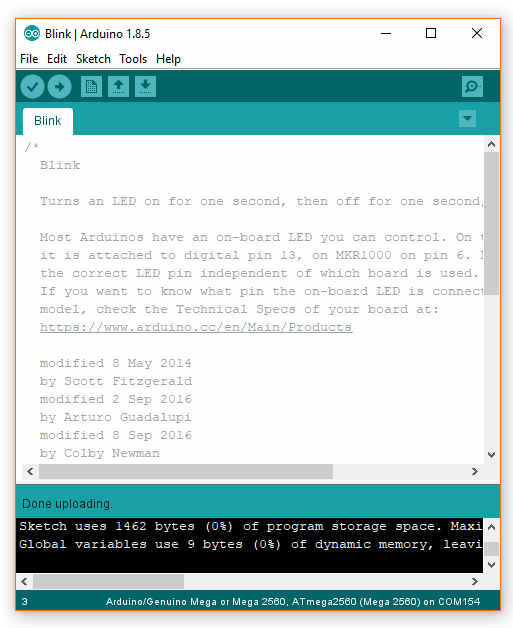
- As upload button is clicked following screens appear on Arduino IDE.
The code is uploaded onto Arduino Board. You can see the LED Blinking on the Arduino Board.

Note: You have to remember these steps for uploading any code onto Arduino.
The lesson is complete.

